
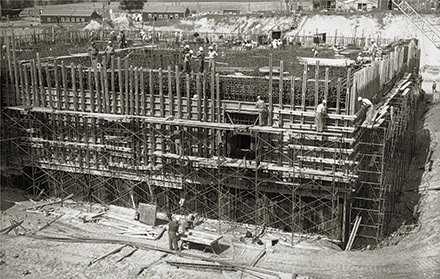 |
| The Diefenbunker under construction 1961. Courtesy of Diefenbunker.ca |
 |
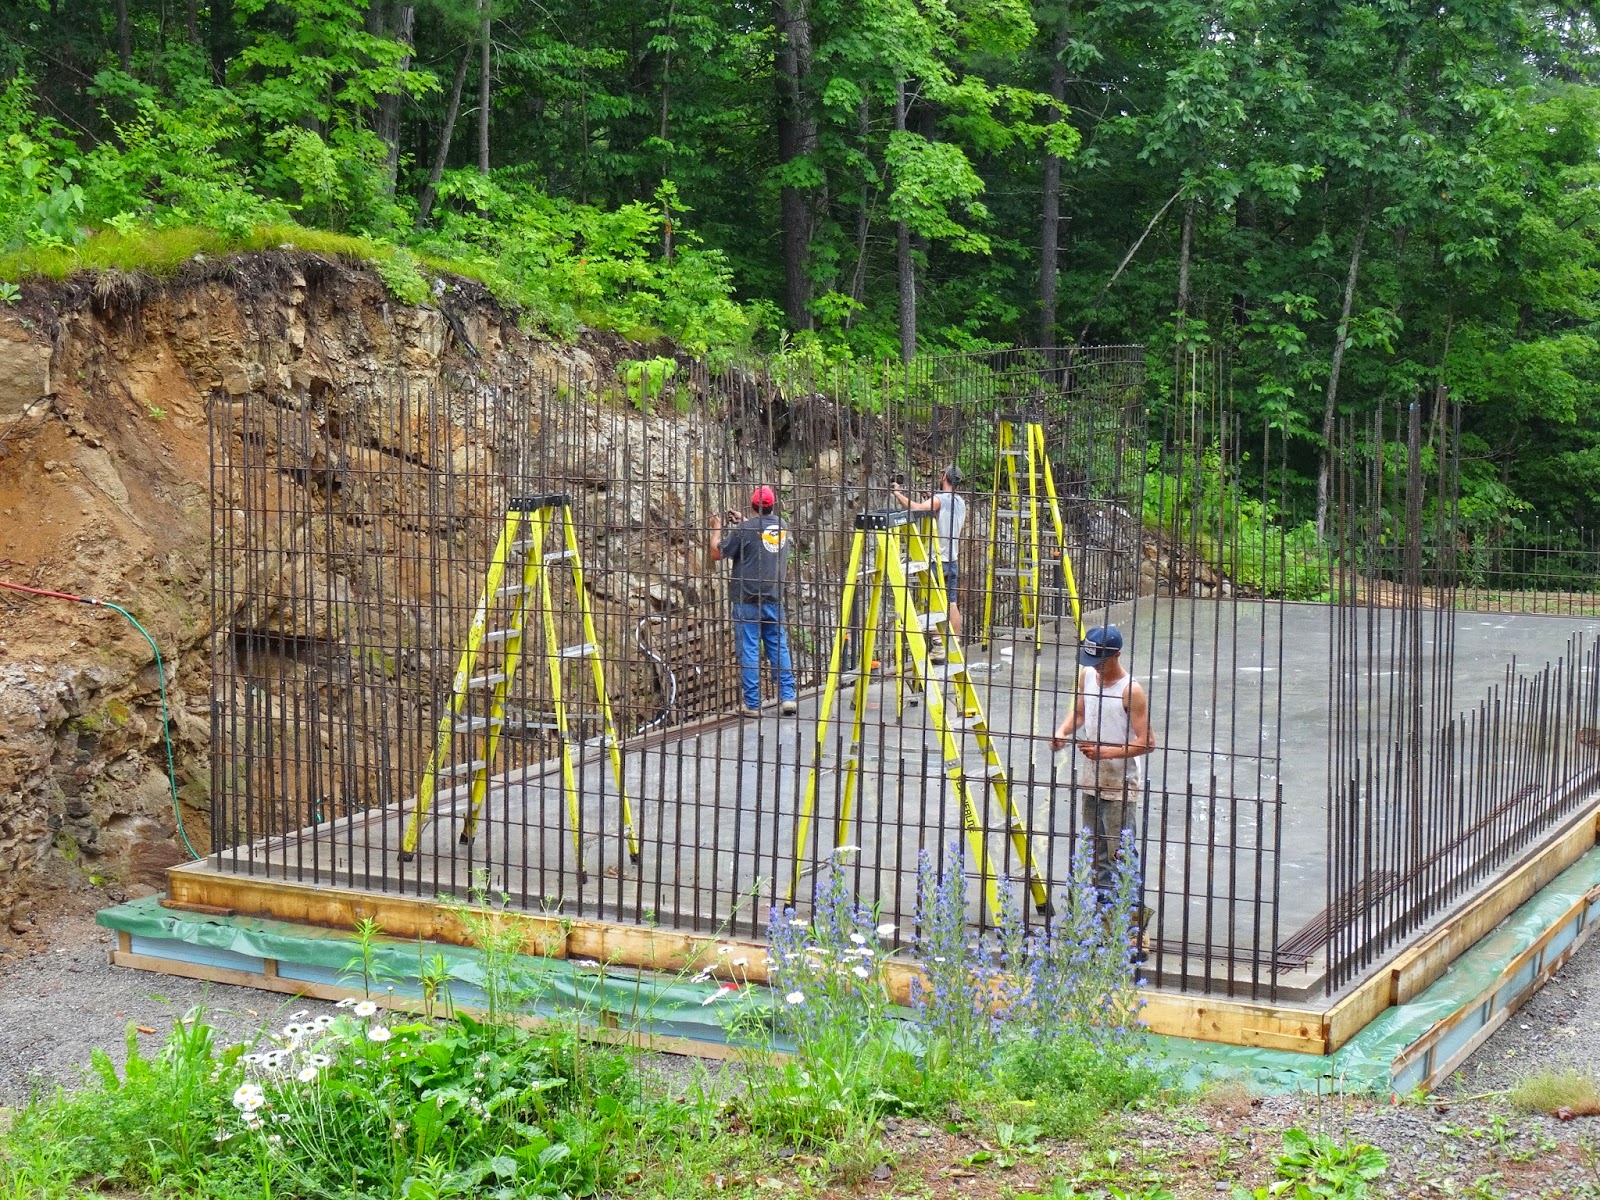
| The TurtleBunker under construction 2014. (Sorry PM Harper, you cannot have your name on this bunker!) |
 |
| 21,000 linear feet of rebar in the slab and walls equals about 10 tons. The Diefenbunker has 5000 tons of steel. Not even close! |
 |
| Forming the TurtleBunker walls. |
So why so much steel, you ask? The concrete slab is a full 12 inches (30.5cm) thick sitting on a 14 inch (35.5cm) floating bed of Styrofoam. Concrete not only shrinks as it dries but continues to expand and contract with temperature changes. The rebar reduces the amount of cracking the slab will endure over its lifetime and helps distribute the weight of loadbearing walls. No saw-cut contraction joints were allowed to be cut in this slab, as specified by the engineers, probably because these saw cuts would likely have to be about 3 inches (7.6cm) deep and would therefore cut through the top layer of rebar installed just 2 inches (5cm) from the slab's surface.
The walls required a similar seemingly over-abundance of rebar. The back wall of the house will be a retaining wall for the hill behind it. Since the concrete is only 6 inches (15.2cm) thick, standing 10 feet (3m) tall, the steel needed to be plentiful and steadfast. There will be massive amounts of pressure against that back wall once backfilled. And even though every last person who has seen the rebar for this house has shaken their heads or rolled their eyes in disbelief and asked us if we are building a skyscraper...or the next Diefenbunker...or if we've just lost our minds all together, we simply smile inside and feel a great sense of security knowing this house has been engineered to last. Nuclear attack, earthquakes and hurricanes be damned. Why should governmental figures be the only ones allowed to hunker down in a bunker when the outside world gets a little out of control?
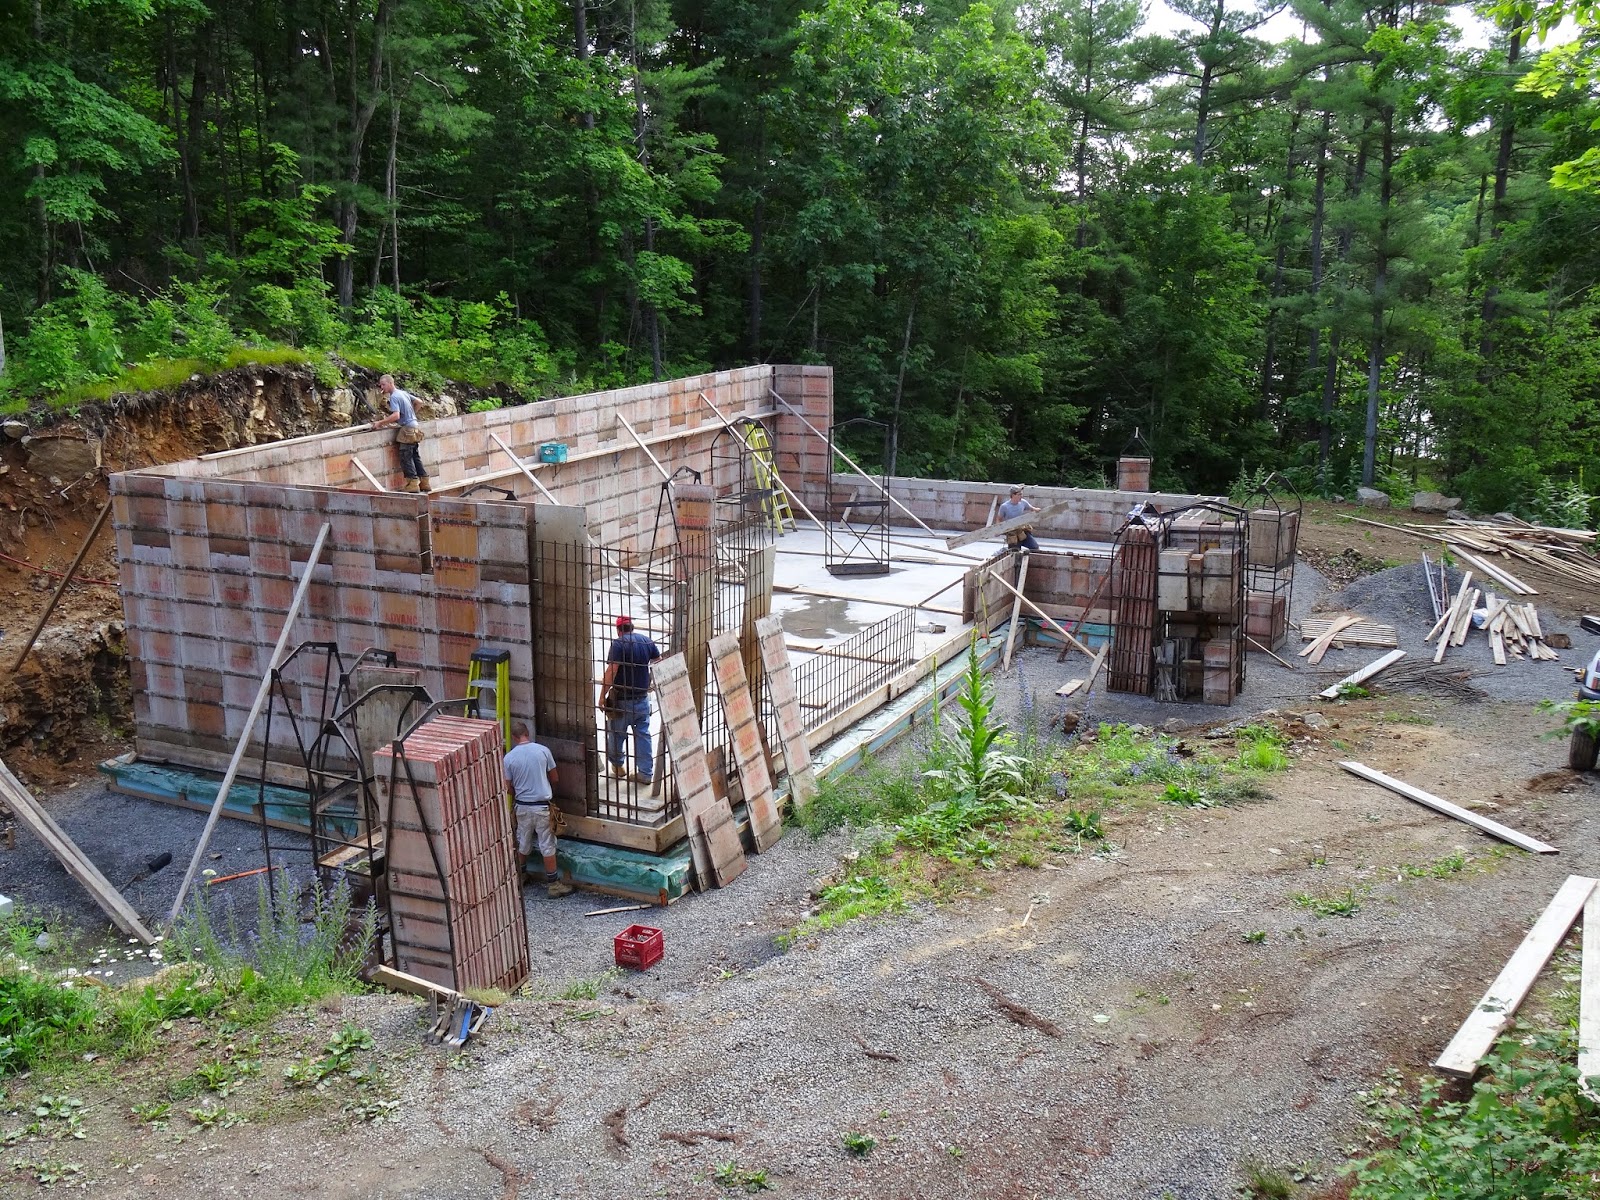
We have so many names for this house: Casa Tortuga, The Turtle Palace, TurtleBunker. But maybe it really needs to be named Castle Tortuga. At one moment during the removal of forms from the walls the whole scene reminded us of a castle. Yes? All we need now is a moat and a drawbridge.
 |
| Castle Tortuga in the making? |
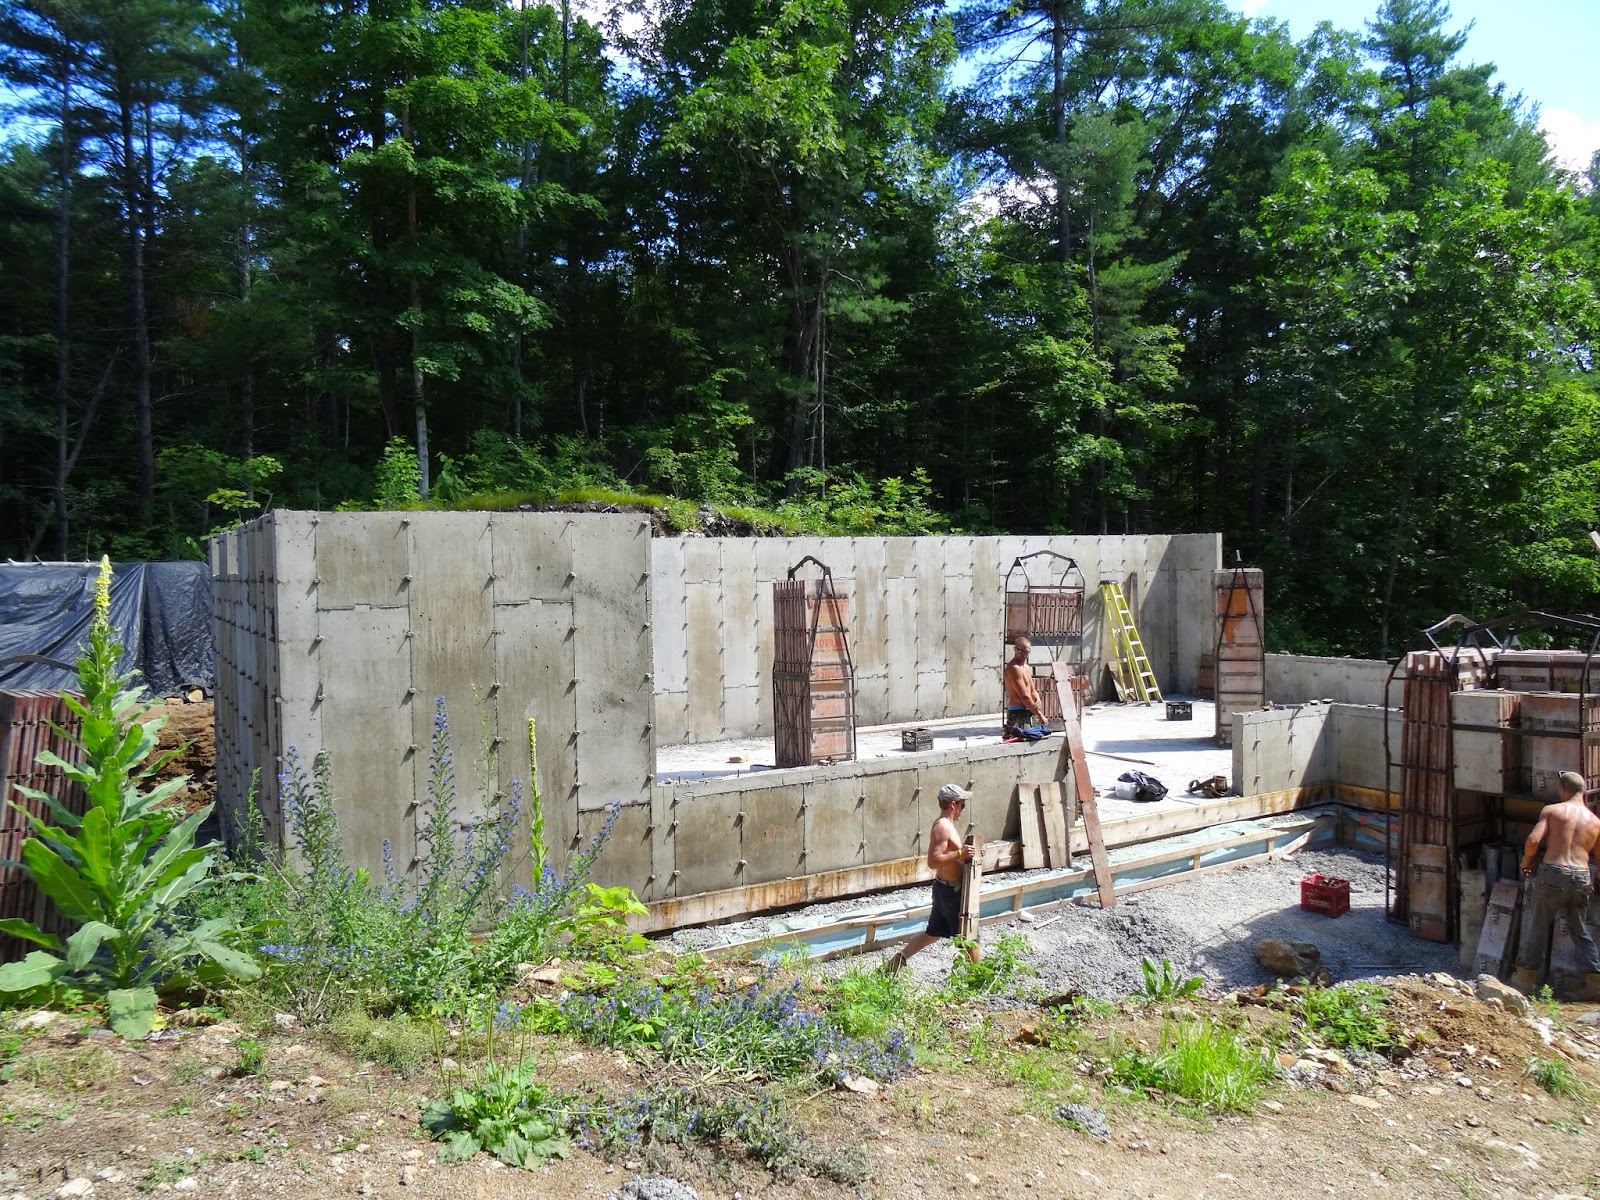 |
| A stressful, yet successful pour complete. |
Notice all the little nibs left behind from the form ties both inside and out in the above photo. Since we will be installing a rigid insulation on both the inside and outside of the concrete, each and every one of those nibs needed to be knocked off. Fun times at Turtle Falls consisted of nib-knocking for days...and days!
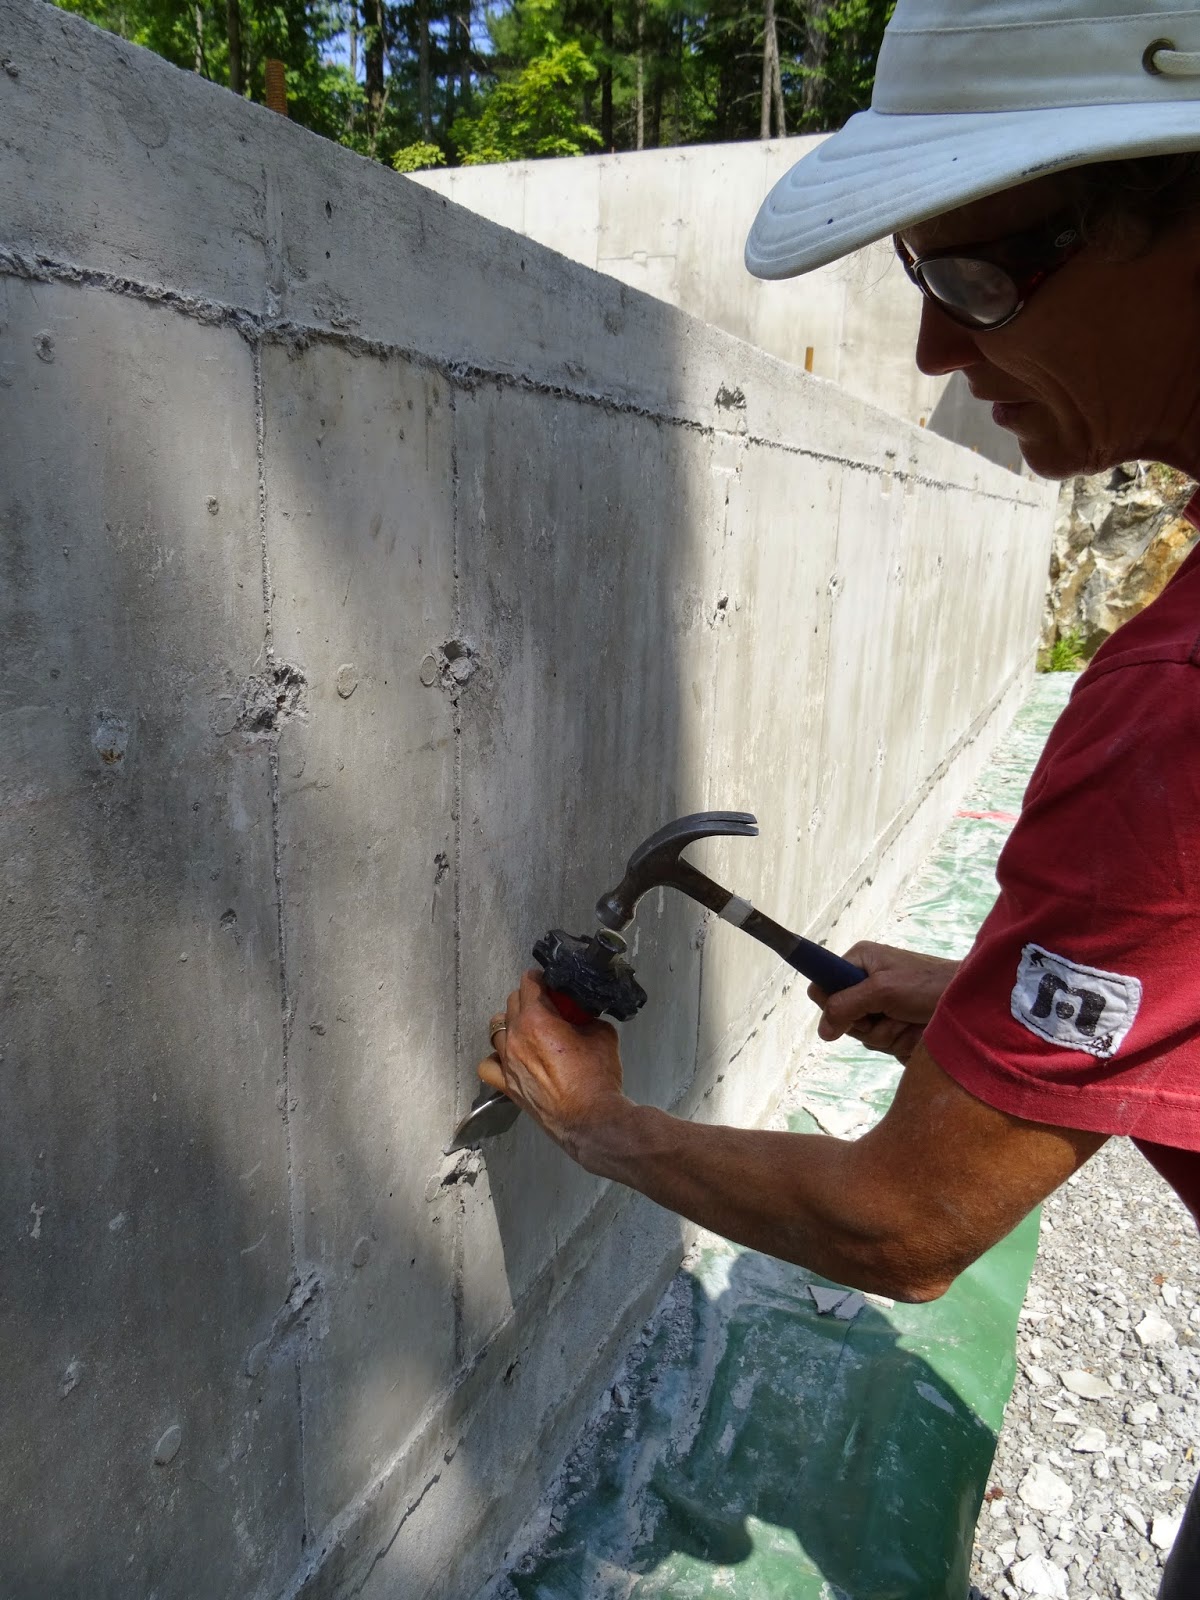 |
| The last nib gets knocked. |
I just wouldn't be a good Canadian if I didn't mention the weather. This summer has looked like the following picture every other day. We got one lonely week of solid sunshine somewhere between the first and second weeks of August. Ever since, we've been back to rain almost every other day.
 |
| This is the very tiresome scene we see too much of from Priscilla's window. |
The ironic part about waterproofing is that things need to be dry to apply waterproofing materials. As you may have guessed from my weather report there was quite a waiting period before we could get to the waterproofing of the joint at the floor and wall. Once we did get our sunny week we wasted no time. The first step was an elastomeric caulk right in the joint. This product needed a week to cure before we could roll on the rubberized membrane. Mother Nature played nice that week and gave us just enough dry days to get this very important step done. Passive houses need to be very air tight and this sealing detail had to be done before we can proceed with anything else.
Those of you familiar with sealing joints for passive house may wonder why we opted not to use the more convenient tapes for this step. It turns out we have a few uneven sections in our floor where the water collects up against this joint and the tapes would most likely fail after successive water submersions thanks to all the rain we've been getting. Even once we get rolling with the framing it will be a while before the roof is installed and any rainwater would be impossible to remove from those collection areas once the 2x6 stud wall is in place. So we chose to caulk and roll! {groan}
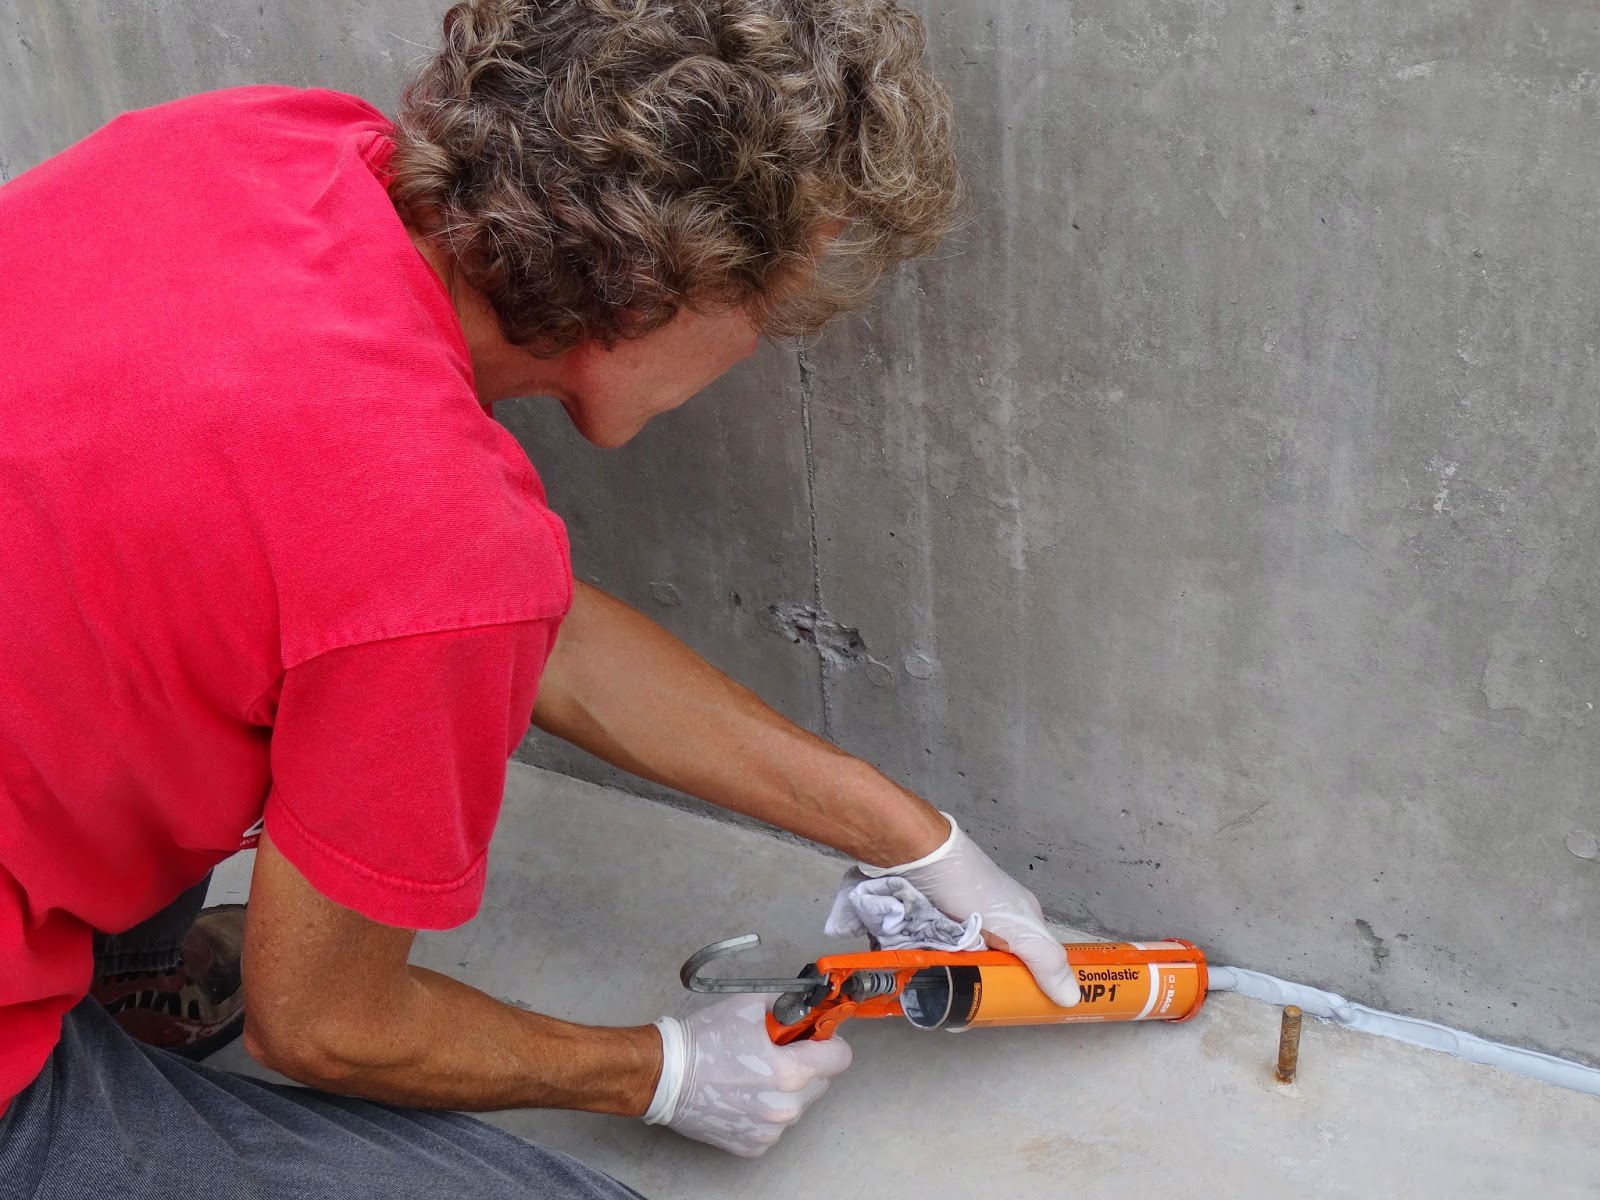 |
| Floor/wall joint is sealed with elastomeric caulk for water and air-tightness. |
 |
| Tooling the caulk for better coverage and adhesion. |
 |
| Rolling on the first of 2 coats of rubberized waterproofing membrane. |
Not all has been lost due to weather though. We have kept the crew busy with building the Turtle Falls workshop while we got the TurtleBunker prepped for them. Here's what they've been up to while we've been nib-knocking and waterproof caulking...
 |
| The Turtle Falls workshop is looking mighty fine. Nice work guys! |
That's all for now. Pray for sunshine!
More later,
Mimi